Alle Beiträge von Alexander Volz

/e/ unofficial 20210921 BQ Aquaris E5s (vegetalte)

I had to build a current /e/ 0.18 unofficial build for the BQ Aquaris E5s (vegetalte).

It is built by the current community docker build image of /e/ (https://gitlab.e.foundation/e/os/docker-lineage-cicd).

Because of errors with the used jack-server and the current Java version i had to downgrade it with a begin.sh userscript, you can find it below as well as the roomservice.xml.

Download

You can download it here: https://files.volzit.de/share/sQ44J8Kd

MD5 + sha256:

cat /srv/zips/vegetalte/e-0.18-n-20210921-UNOFFICIAL-20210921.zip.md5sum
10c527eb6eb5d095418a2075d7bcd7dd  e-0.18-n-20210921-UNOFFICIAL-vegetalte.zip

cat /srv/zips/vegetalte/e-0.18-n-20210921-UNOFFICIAL-vegetalte.zip.sha256sum 
fabcfea7c894ed6a00e31133796711806374a151f8c5724927b440fd9a6285b2  e-0.18-n-20210921-UNOFFICIAL-vegetalte.zip

Installation

If you are not already on the latest stock rom, i had to flash it before /e/ because of a weird error with the realtime clock. So if you have any problems with passing the startup wizzard try the following:
Your bootloader needs to be unlocked for the following steps!

  • Download the latest stock Firmware BQ_Aquaris_E5_4G_4.5.0_20161125_1331_6.0.1.zip (you can find many sources online)
  • Download the latest twrp for vegetalte (https://dl.twrp.me/vegetalte/twrp-3.5.1_9-0-vegetalte.img.html)
  • Extract it
  • Make sure adb and fastboot are ready to go
  • go to the extracted folder and the Subfolder “Firmware + Tool”
  • Boot your phone to fastboot (press Power and hold the volume button down until you are in fastboot)
  • on windows run: “./8939_fastboot_all_images.bat” or just “8939_fastboot_all_images.bat” depending if you are in powershell or cmd
  • on linux run: “chmod +x 8939_fastboot_all_images.sh ; ./8939_fastboot_all_images.sh”
  • wait until the phone reboots and click through the welcome wizzard
  • connect wlan and make sure the time is synchronized
  • Reboot to fastboot (Dont turn off and on the device!!!) [hit restart on your devices power off menu, press okay and instantly hold the volume button down until you are in fastboot]
  • run “fastboot flash recovery twrp-3.5.1_9-0-vegetalte.img”
  • run “fastboot reboot” (Dont turn off and on the device!!!) and while pressing enter hold the volume button up on the phone to instantly boot to twrp
  • go to wipe->advanced wipe
  • check “Dalvik/Art Cache”, “System”, “Cache”, “data” and “Internal Storage”
  • wipe it
  • send your image to the phone with “adb push e-0.18-n-20210921-UNOFFICIAL-vegetalte.zip /sdcard/”
  • reboot it (Dont turn off and on the device!!!)
  • pass the startup wizzard, connect wifi and make sure your clock is set

Congrats, you can now use your degoogled and “updated” Android 7.1.2 and even use the encryption feature 🙂

Build it yourself

If you want to build it yourself, you need a linux machine with docker installed and around 200G free space.

  • Create the folders:
mkdir -p /srv/lineagebuild/build/src && \
mkdir -p /srv/lineagebuild/build/zips && \
mkdir -p /srv/lineagebuild/build/logs && \
mkdir -p /srv/lineagebuild/build/ccache && \
mkdir -p /srv/lineagebuild/build/keys && \
mkdir -p /srv/lineagebuild/build/userscripts && \
mkdir -p /srv/lineagebuild/build/local_manifest
  • Create the begin userscript:
cat <<EOT >> /srv/lineagebuild/build/userscripts/begin.sh
#!/bin/bash
apt-get update
apt-get install adoptopenjdk-8-hotspot=8u282-b08-3 -y --allow-downgrades
EOT
  • Create the roomservice xml:
cat <<EOT >> /srv/lineagebuild/build/local_manifest/vegetalte.xml
<?xml version="1.0" encoding="UTF-8"?>
<manifest>
<project name="LineageOS/android_device_bq_vegetalte" path="device/bq/vegetalte" remote="github" revision="cm-14.1"/>
<project name="LineageOS/android_device_bq_msm8916-common" path="device/bq/msm8916-common" remote="github" revision="cm-14.1"/>
<project name="LineageOS/android_kernel_bq_msm8939" path="kernel/bq/msm8939" remote="github" revision="cm-14.1"/>
<project name="TheMuppets/proprietary_vendor_bq" path="vendor/bq" remote="github" revision="cm-14.1"/>
<project name="LineageOS/android_device_qcom_common" path="device/qcom/common" remote="github" revision="cm-14.1"/>
</manifest>
EOT
  • Run the build with docker:
docker run \
-v "/srv/lineagebuild/build/src:/srv/src" \
-v "/srv/lineagebuild/build/zips:/srv/zips" \
-v "/srv/lineagebuild/build/logs:/srv/logs" \
-v "/srv/lineagebuild/build/ccache:/srv/ccache" \
-v "/srv/lineagebuild/build/keys:/srv/keys" \
-v "/srv/lineagebuild/build/local_manifest:/srv/local_manifests" \
-v "/srv/lineagebuild/build/userscripts:/srv/userscripts" \
-e "REPO=https://gitlab.e.foundation/e/os/releases.git" \
-e "BRANCH_NAME=v0.18.1-nougat" \
-e "DEVICE_LIST=vegetalte" \
-e "INCLUDE_PROPRIETARY=false" \
-e "ANDROID_JACK_VM_ARGS=-Dfile.encoding=UTF-8 -XX:+TieredCompilation -Xmx18G" \
registry.gitlab.e.foundation:5000/e/os/docker-lineage-cicd:community
  • The output should be located under /srv/lineagebuild/build/zips/vegetalte/e-0.18-n-*-UNOFFICIAL-vegetalte.zip
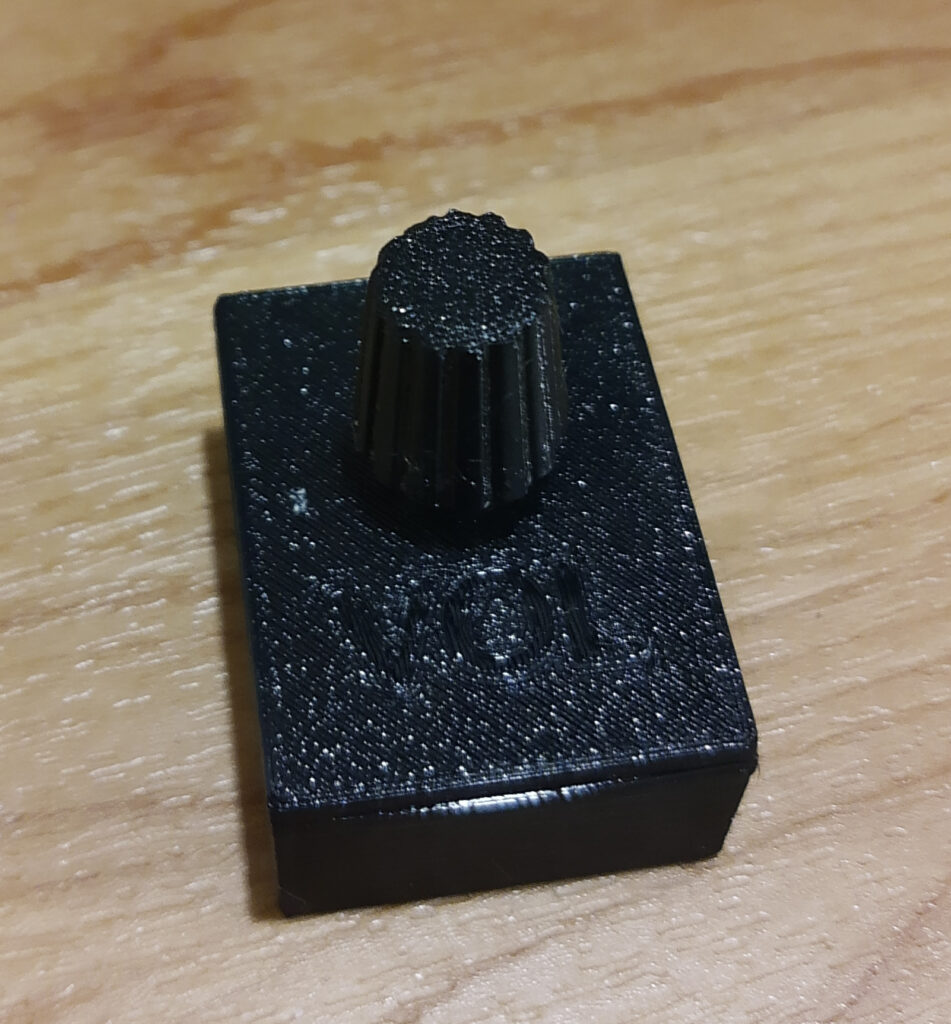
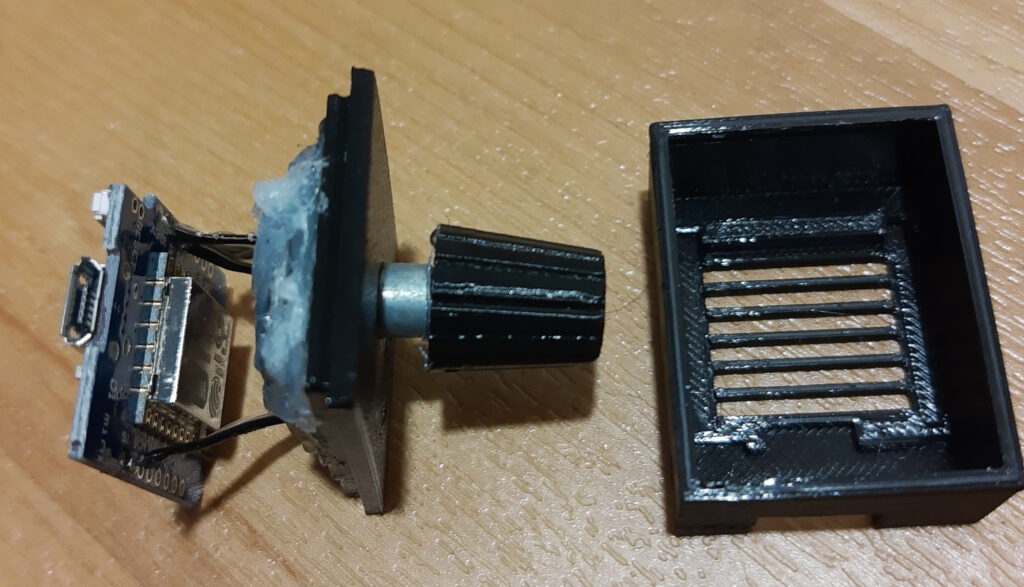
D.I.Y wifi MIDI controller für Lautstärkeregelung / D.I.Y wifi MIDI controller for volume control

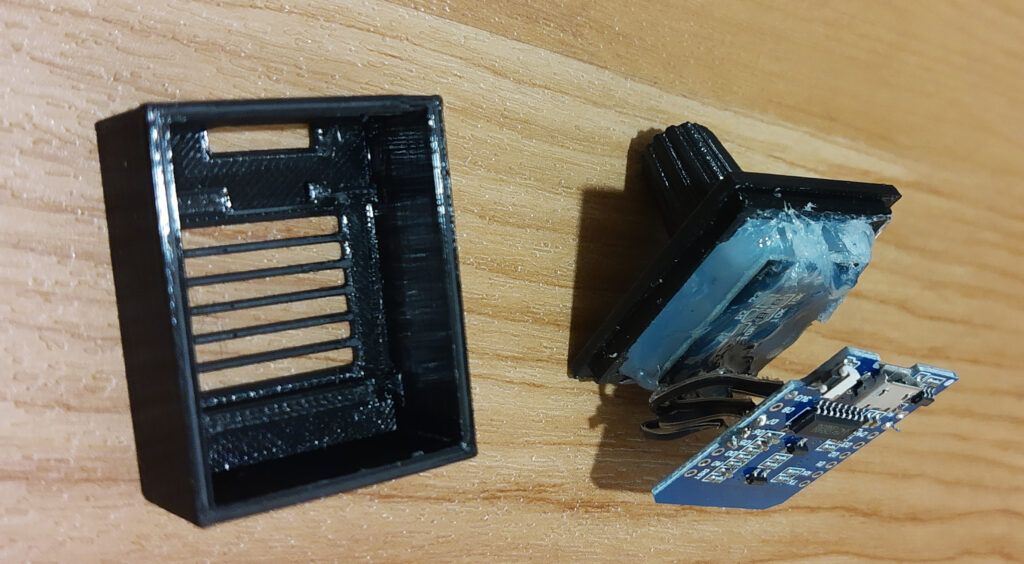
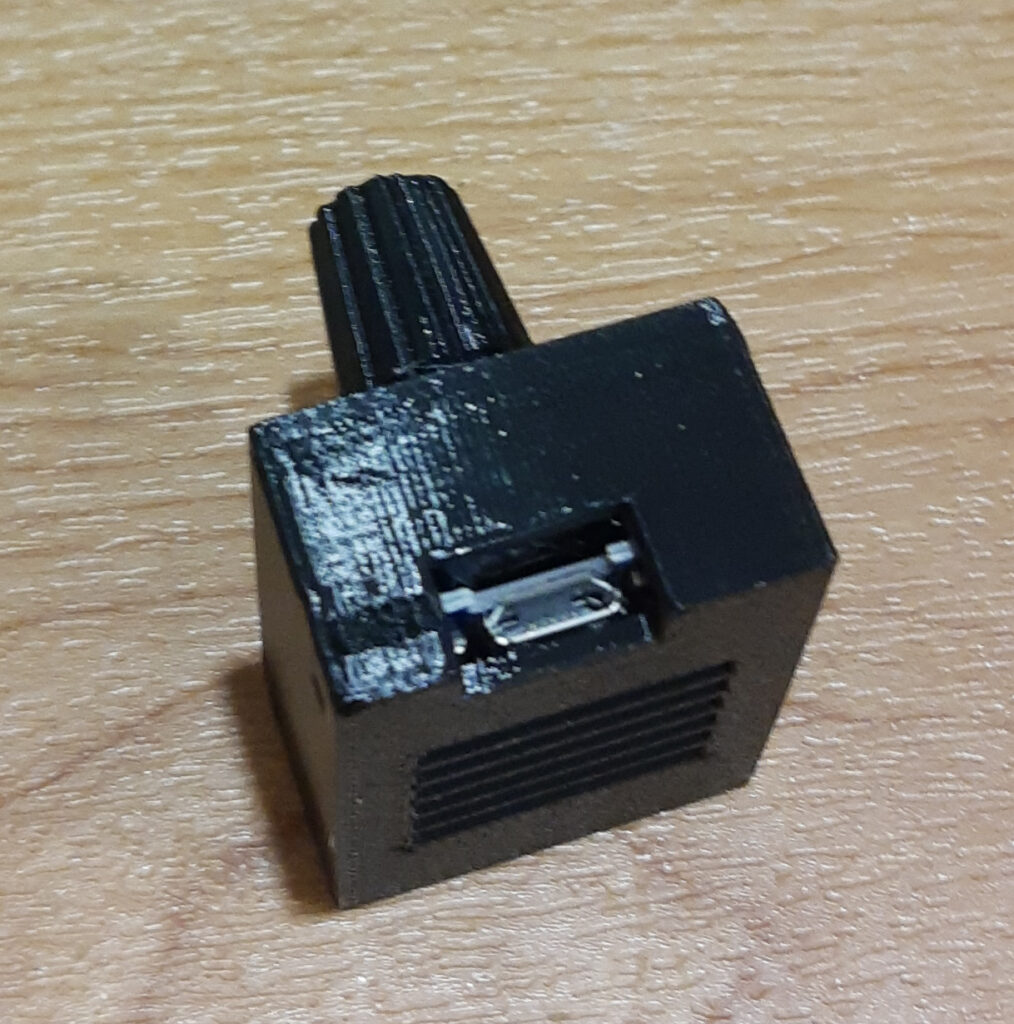
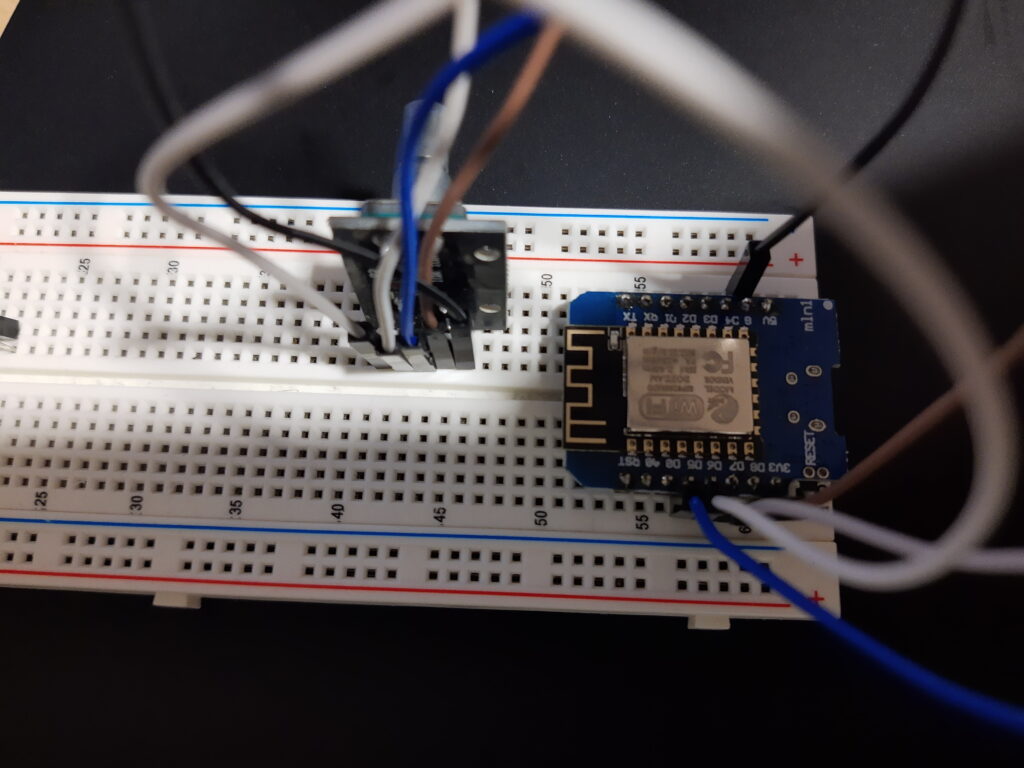
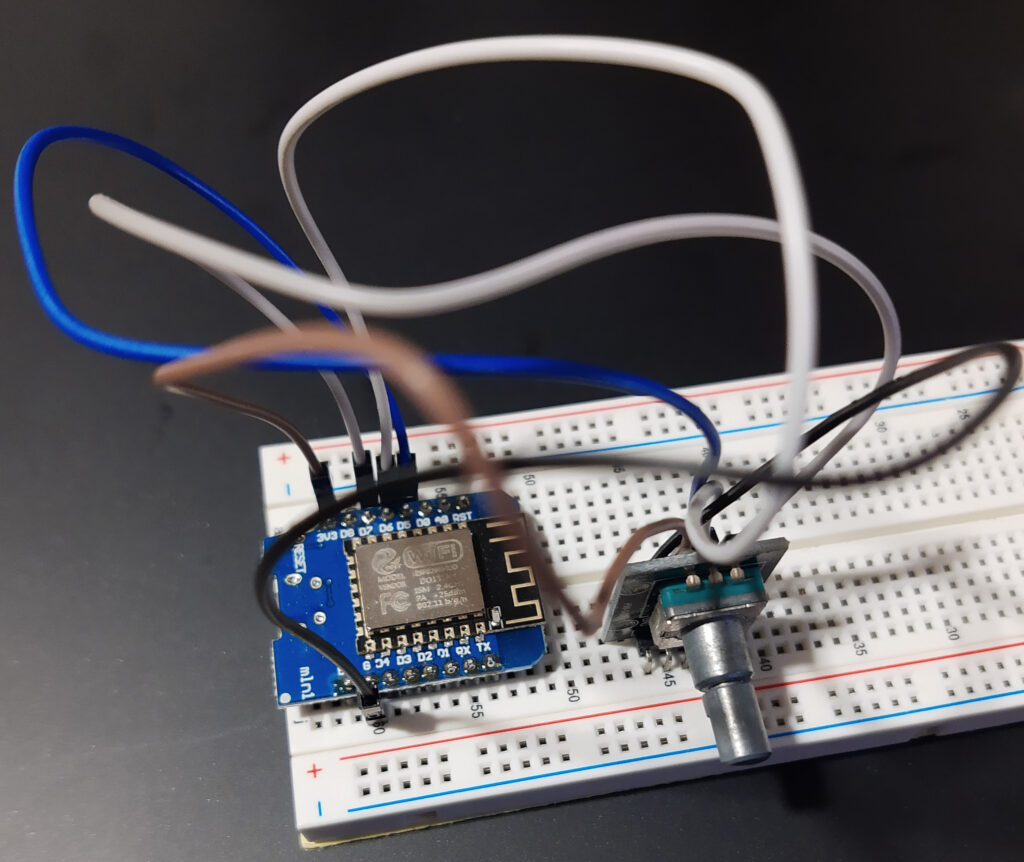
Um auf kleinen Partys die Lautstärke der Musik in Ableton live einfach aus der Ferne zu steuern, habe ich vor einigen Tagen einen kleinen midi controller gebaut, der mittels rtpMIDI kommunizieren kann.

Das ganze besteht aus einem Wemos D1, einem KY-40 Rotary Encoder, einem 3d gedruckten Gehäuse und einem stück Software für den Wemos D1.

Alles zum Projekt findest du im zugehörigen Github Repository: https://github.com/Apfelwurm/minivolumidi


A few days ago i have built a little remote midi controller to control the volume of music in ableton live when i am on smaller parties.

The thing consists of a Wemos D1, a KY-40 rotary encoder, a 3d printed enclosure and a piece of software for the Wemos D1.

You can find everything about it on the projects github repository: https://github.com/Apfelwurm/minivolumidi

VMware Tools Treiber können nicht automatisch hinzugefügt werden (0x800f0247) / VMware Tools failed to install driver automatically (0x800f0247)

Bei der aktualisierung auf die letzten VMware Tools Version 11.0.5 kam ich an einer Maschine an den punkt dass die Treiber nicht mehr installiert werden konnten:

“Setup failed to install the VMCI Virtual Machine Communication Interface driver automatically. This driver will have to be installed manually”
“Setup failed to install the VSock Virtual Machine Communication Interface Sockets driver automatically. This driver will have to be installed manually.”
“Setup failed to install the VMXNet3 driver automatically. This driver will have to be installed manually.”

ich konnte folgenden Resultcode im Log finden:
“HRESULT code 0x800f0247 (A problem was encountered while attempting to add the driver to the store.)”

Nachdem viele Versuche das Problem anzugehen und viele Tests mit anderen Versionen mich nicht weiter brachten, machte mich der Vmware support darauf aufmerksam dass ich folgendes im Log übersehen hatte:
“XXXXXXXXX .inf failed verification| winerror code 2148204812 (A certificate was explicitly revoked by its issuer.)”

Als ich das hörte, erinnerte ich mich an Probleme mit anderen Installationen aufgrund von bestimmter fehlender Rootzertifikate bei Windows Server 2019.

Hierzu hatte ich folgnde Lösung Dokumentiert:

Bei Kaspersky gibt es noch das alte Rootsupd Tool von Microsoft, welches ansich keine aktuellen Zertifikate mehr enthält, aber das zum einspielen benötigte updroots.exe enthält. (http://media.kaspersky.com/utilities/CorporateUtilities/rootsupd.zip)
Um jenes zu extrahieren muss dieses tool sollte folgendermaßen ausgeführt werden:

rootsupd.exe /c /t:C:\temp\Zertifikate

danach sollten im Ordner C:\temp\Zertifikate alle *.sst Dateien gelöscht werden, da diese so oder so veraltet sind.
Um nun aktuelle Zertifikate zu beziehen muss das in Windows integrierte Certutil genutzt werden, welches mit folgendem Kommando die aktuellen Rootca Zertifikate aus Windows update herunterlädt (Achtung, in Umgebungen in der ein Proxy nötigt ist, muss dieser über die Internetoptionen gesetzt werden):

certutil.exe -generateSSTFromWU roots.sst

die von dort gespeicherte roots.sst nun in den Ordner C:\temp\Zertifikate legen und dort folgendes ausführen:

updroots.exe roots.sst

Nun klappt die Installation wie gewünscht.

Unbeaufsichtige Installation von Ableton Live Packs mit Powershell | Unattended installation of Ableton Live packs with powershell

Hallo zusammen,
die letzten Tage hatte ich etwas mit der Maschine auf der ich Ableton Live betreibe zu kämpfen, weswegen ich mich letztich zum neu aufsetzen entschloss. Dabei kam ich nach der Installation von Live an den Punkt an dem die Packs installiert werden müssen. Laut Ableton gibt es hierfür keinen anderen Weg als das auführen jedes .alp packs von Hand.

Ich habe hierfür ein Powershell Script geschrieben, welches zusammen mit den .alp Packs in ein Verzeichnis gelegt und ausgeführt werden muss. Es geht jede im Ordner vorhandene Datei durch und führt diese aus. Nach der jeweiligen Ausführung lauscht es auf den Disk I/O von Live und wartet entsprechend mit der Ausführung des nächsten.


Hey folks,
last days i had a big struggle with my ableton live mashine that forced me to reinstall Windows. After installing all drivers and live i had to install all .alp packs and ableton support told me there is no way than doing it by hand.

So i wrote a little powershell script that executes every .alp file in its working directory (so put it into your .alp source folder) and listens to the disk IO of live to sleep until the pack installation is completed.

Get-ChildItem *.alp |ForEach-Object {

$constr = ".\" + $_.name
Invoke-Expression $constr
sleep 4

while ($(gwmi Win32_PerfFormattedData_PerfProc_Process | sort IOReadBytesPersec -des | select  Name,IOWriteBytesPersec|where {$_.name -Like "*ableton Live*"}).IOWriteBytesPersec -ne 0)
{
sleep 20
}
sleep 10
while ($(gwmi Win32_PerfFormattedData_PerfProc_Process | sort IOReadBytesPersec -des | select  Name,IOWriteBytesPersec|where {$_.name -Like "*ableton Live*"}).IOWriteBytesPersec -ne 0)
{
sleep 20
}

}

abletonpackinstall.ps1 download

Exchange 2013 – nach Dezember 2017 Update: Imap4 Server’s Online status has changed to False / “socket closed while reading data from server” IMAPTLS

STAND: Dezember 2017
Hallo zusammen, heute funktionierte plötzlich (nach den Updates vergangenen Freitag) der IMAP4 Zugriff auf unsere Exchange Postfächer nicht mehr.
Die Fehlermeldung des Pearl handlers war: “socket closed while reading data from server
Sowohl der Microsoft Exchange IMAP4 als auch der Microsoft Exchange IMAP4 Background Service liefen und auch ein Neustart brachte keine Abhilfe.

Der Eventlog gab mit der Ereignis-ID 1011 folgende Meldung: “The IMAP4 server’s Online status has changed to False.

Somit schaute ich nach dem Komponentenstatus über die Exchange Managementshell:

Get-ServerComponentState -Identity SERVERNAME

[PS] C:\Windows\system32>Get-ServerComponentState -Identity SERVERNAME

Server                                  Component                               State
------                                  ---------                               -----
EXCHANGESRV01.DOMAIN.de                     ServerWideOffline                       Active
EXCHANGESRV01.DOMAIN.de                     HubTransport                            Active
EXCHANGESRV01.DOMAIN.de                     FrontendTransport                       Active
EXCHANGESRV01.DOMAIN.de                     Monitoring                              Active
EXCHANGESRV01.DOMAIN.de                     RecoveryActionsEnabled                  Active
EXCHANGESRV01.DOMAIN.de                     AutoDiscoverProxy                       Active
EXCHANGESRV01.DOMAIN.de                     ActiveSyncProxy                         Active
EXCHANGESRV01.DOMAIN.de                     EcpProxy                                Active
EXCHANGESRV01.DOMAIN.de                     EwsProxy                                Active
EXCHANGESRV01.DOMAIN.de                     ImapProxy                               Inactive
EXCHANGESRV01.DOMAIN.de                     OabProxy                                Active
EXCHANGESRV01.DOMAIN.de                     OwaProxy                                Active
EXCHANGESRV01.DOMAIN.de                     PopProxy                                Active
EXCHANGESRV01.DOMAIN.de                     PushNotificationsProxy                  Active
EXCHANGESRV01.DOMAIN.de                     RpsProxy                                Active
EXCHANGESRV01.DOMAIN.de                     RwsProxy                                Active
EXCHANGESRV01.DOMAIN.de                     RpcProxy                                Active
EXCHANGESRV01.DOMAIN.de                     UMCallRouter                            Active
EXCHANGESRV01.DOMAIN.de                     XropProxy                               Active
EXCHANGESRV01.DOMAIN.de                     HttpProxyAvailabilityGroup              Active
EXCHANGESRV01.DOMAIN.de                     ForwardSyncDaemon                       Inactive
EXCHANGESRV01.DOMAIN.de                     ProvisioningRps                         Inactive
EXCHANGESRV01.DOMAIN.de                     MapiProxy                               Active
EXCHANGESRV01.DOMAIN.de                     EdgeTransport                           Active
EXCHANGESRV01.DOMAIN.de                     HighAvailability                        Active
EXCHANGESRV01.DOMAIN.de                     SharedCache                             Active

Wobei zu sehen war dass der ImapProxy sich aus bislang nicht gefundenen Gründen nach dem letzten Windows Update auf Inaktiv gesetzt hatte.
Um ihn wieder zu aktivieren ist folgendes Kommando notwendig:
Set-ServerComponentState -Identity SERVERNAME -State Active -Requester HealthAPI -Component Imap

[PS] C:\Windows\system32>Set-ServerComponentState -Identity SERVERNAME -State Active -Requester HealthAPI -Component Imap
Proxy
[PS] C:\Windows\system32>Get-ServerComponentState -Identity SERVERNAME

Server                                  Component                               State
------                                  ---------                               -----
EXCHANGESRV01.DOMAIN.de                     ServerWideOffline                       Active
EXCHANGESRV01.DOMAIN.de                     HubTransport                            Active
EXCHANGESRV01.DOMAIN.de                     FrontendTransport                       Active
EXCHANGESRV01.DOMAIN.de                     Monitoring                              Active
EXCHANGESRV01.DOMAIN.de                     RecoveryActionsEnabled                  Active
EXCHANGESRV01.DOMAIN.de                     AutoDiscoverProxy                       Active
EXCHANGESRV01.DOMAIN.de                     ActiveSyncProxy                         Active
EXCHANGESRV01.DOMAIN.de                     EcpProxy                                Active
EXCHANGESRV01.DOMAIN.de                     EwsProxy                                Active
EXCHANGESRV01.DOMAIN.de                     ImapProxy                               Active
EXCHANGESRV01.DOMAIN.de                     OabProxy                                Active
EXCHANGESRV01.DOMAIN.de                     OwaProxy                                Active
EXCHANGESRV01.DOMAIN.de                     PopProxy                                Active
EXCHANGESRV01.DOMAIN.de                     PushNotificationsProxy                  Active
EXCHANGESRV01.DOMAIN.de                     RpsProxy                                Active
EXCHANGESRV01.DOMAIN.de                     RwsProxy                                Active
EXCHANGESRV01.DOMAIN.de                     RpcProxy                                Active
EXCHANGESRV01.DOMAIN.de                     UMCallRouter                            Active
EXCHANGESRV01.DOMAIN.de                     XropProxy                               Active
EXCHANGESRV01.DOMAIN.de                     HttpProxyAvailabilityGroup              Active
EXCHANGESRV01.DOMAIN.de                     ForwardSyncDaemon                       Inactive
EXCHANGESRV01.DOMAIN.de                     ProvisioningRps                         Inactive
EXCHANGESRV01.DOMAIN.de                     MapiProxy                               Active
EXCHANGESRV01.DOMAIN.de                     EdgeTransport                           Active
EXCHANGESRV01.DOMAIN.de                     HighAvailability                        Active
EXCHANGESRV01.DOMAIN.de                     SharedCache                             Active

Sofort konnte wieder per IMAP zugegriffen werden und es waren keine weiteren Seiteneffekte zu beobachten.

Installiert wurden folgende Updates:
*KB4048957
*KB4049068
*KB890830
*KB915597
*KB4048960
*KB4047206
*KB4049016

Default Profile Settings anpassen bei Windows Server 2012 R2

Hallo zusammen,
aktuell erstelle ich ein VMWare Template für Windows Server 2012R2. Dabei wollte ich direkt einige änderungen im Default Profil vornehmen (Ordnereinstellungen, Taskleiste etc..).
Um solche änderungen zu machen benötigt man eine frisch installierte Server 2012R2 VM.

Man muss das lokale Admin Konto mittels Sysprep ins Default Profil kopieren.

Dann geht man wie folgt vor:
Default Profile Settings anpassen bei Windows Server 2012 R2 weiterlesen

Office 2010 / 2013 Languagepack Installation automatisieren

Aktuell beschäftige ich mich mit der mehrsprachigen Verteilung von Office 2013 ProPlus.
Hierzu installiere ich grundsätzlich ein Englisches Office Paket, welches mit dem OCT angepasst ist.

Zudem habe ich mir die jeweiligen Languagepacks besorgt. Beispiel ist hier das deutsche Sprachpaket.
Es kommt von Microsoft als einzelne .Exe.

Diese wird zunächst mit folgendem Kommando entpackt:
Office 2010 / 2013 Languagepack Installation automatisieren weiterlesen

MDT 2013 Anpassung: Email Benachrichtigung

Hallo Zusammen, ich baue aktuell an einer MDT Umgebung, die neben dem OSD auch Softwareinstallationen und Windows Updates im laufenden Betrieb ausführen soll.
Hierbei möchten wir grundsätzlich per Email benachrichtigt werden. Wenn in der Task sequenz Fehler auftreten wird die geparste Results.xml, welche normalerweise im Summarywizzard angezeigt wird mit gesendet.
Sobald ein Fehler oder eine Warnung auftritt wird die Existenz von folgenden Logfiles überprüft und alle existenten werden angehängt.

  • C:\Windows\Temp\DeploymentLogs\LiteTouch.log
  • C:\Windows\Temp\DeploymentLogs\ZTIGather.log
  • C:\Users\Administrator\AppData\Local\Temp\smsts.log
  • C:\Users\Administrator\AppData\Local\Temp\SMSTSLog\smsts.log
  • C:\Windows\Temp\BDDLogs\LiteTouch.log
  • C:\Windows\Temp\BDDLogs\BDD.log
  • C:\_SMSTaskSequence\smsts.log
  • X:\MININT\SMSOSD\OSDLOGS\BDD.LOG
  • X:\MININT\SMSOSD\OSDLOGS\smsts.LOG
  • C:\MININT\SMSOSD\OSDLOGS\smsts.LOG
  • C:\MININT\SMSOSD\OSDLOGS\BDD.LOG

MDT 2013 Anpassung: Email Benachrichtigung weiterlesen

Windows 7 Update Agent update 7.6.7601.19161 für MDT/SCCM (error 0x8007000e / Update Timeouts)

Hallo Zusammen,

aktuell bin ich mal wieder dabei Windows 7 mittels MDT zu verteilen.

Beim Build & Capture mit dem Windows 7 Professional SP1 Image bekam ich Probleme mit Timeouts beim Updaten. Nach etwas Recherche stieß ich auf den Technet Artikel von Justin Chalfant (link), welcher jenes Problem genauer analysiert. Er testete hier genau wie sich bestimmte Versionen de Update Agents mit großen und kleinen WSUS Datenbanken verhalten. (lesenswert)

Da er an dieser Stelle aber nur ein Paket für die Version 7.6.7601.19116 anbietet und Microsoft mit dem März Update KB3138612 den Agenten auf 7.6.7601.19161 gehoben hat, habe ich ein neues Paket gebastelt.
Windows 7 Update Agent update 7.6.7601.19161 für MDT/SCCM (error 0x8007000e / Update Timeouts) weiterlesen

SCCM 2012 R2 SP1 Driver Reiter bei Boot Images fehlen – Windows ADK 10

Hallo Zusammen,

beim Update auf den Windows ADK10 während der Migration auf SCCM 2012 R2 SP1 wurden die Windows PE boot Images im SCCM nicht aktualisiert.

Da SCCM im Windows PE bereich die enthaltene Version mit der installierten ADK Version abgleicht und einen Unterschied feststellt, werden die Servicereiter (Images, Drivers etc..) nicht angezeigt.

Um dieses Problem zu beheben hat Henrik Rading auf seinem Blog (http://blog.coretech.dk/hra  | Link zum Artikel) einen Lösungsweg  SCCM 2012 R2 SP1 Driver Reiter bei Boot Images fehlen – Windows ADK 10 weiterlesen